We have all been there: You find the perfect wig, you take it out of the box, and you slide it on—only to discover that instead of a sleek new look, the silhouette feels unnaturally high or bumpy. For those blessed with thick, voluminous natural hair, the struggle to achieve a flat, natural look is real. It is arguably the most common anxiety for new wig wearers: the fear of the “helmet head” effect.
The secret to a flawless install isn’t usually the wig itself; it lies in what’s happening underneath. Creating a flat foundation is an art form, but it is one that anyone can master with the right techniques. Whether you are wearing a piece for medical reasons or fashion, understanding how to redistribute the density of your biological hair is the key to unlocking seamless wig blending & realistic hairline techniques. When your natural hair is properly secured, the wig sits closer to the scalp, moving and laying exactly how it was designed to.
The Physics of a Flat Foundation
Before we dive into the braiding patterns, it is helpful to understand the goal. When you have thick hair, you are managing volume. If you simply wrap your hair in a bun at the back, you create a localized bulge that distorts the shape of the wig.
The goal of a proper foundation is distribution. You want to spread your hair’s density across the flattest parts of your head (the nape and the sides) while minimizing bulk at the crown, where wigs often have the least amount of stretch. Think of it less like hiding your hair and more like sculpting a new surface for the wig to rest upon.
Diagnostic: Choosing Your Method
Not all flattening techniques work for every hair type. What works for someone with shoulder-length fine hair might be disastrous for someone with waist-length, high-density texture. Use this quick diagnostic to find your starting point:
- If you have short to medium hair (Chin to Shoulder): The Straight-Back Cornrow or Slick-Back method is your best friend.
- If you have long or very thick hair: The Beehive pattern is essential for distributing bulk evenly without creating a “hump” at the nape.
- If you have a sensitive scalp or fine hair: Flat Twists reduce tension while keeping the profile low.
- If you cannot braid: The Molding/Slick-Down technique offers a viable alternative.
The Visual Glossary of Flattening Techniques
1. The Classic Straight-Back Cornrows
This is the gold standard for wig prep. By braiding the hair close to the scalp from the hairline to the nape, you create “tracks” that allow air to circulate while keeping the hair flat.
The Technique:Create 6 to 10 vertical parts from your forehead to the nape of your neck. Braid each section firmly against the scalp (cornrowing). When you reach the ends of the hair, continue braiding to the very tip.
The “Thick Hair” Adjustment:The mistake most people make is creating too few braids. If you have thick hair, 4 large cornrows will still look bulky. You need smaller, more numerous braids (think 10-12) to flatten the density. Sew the loose hanging tails of the braids flat against the gaps between the cornrows at the back of your head using a needle and thread, rather than piling them up.
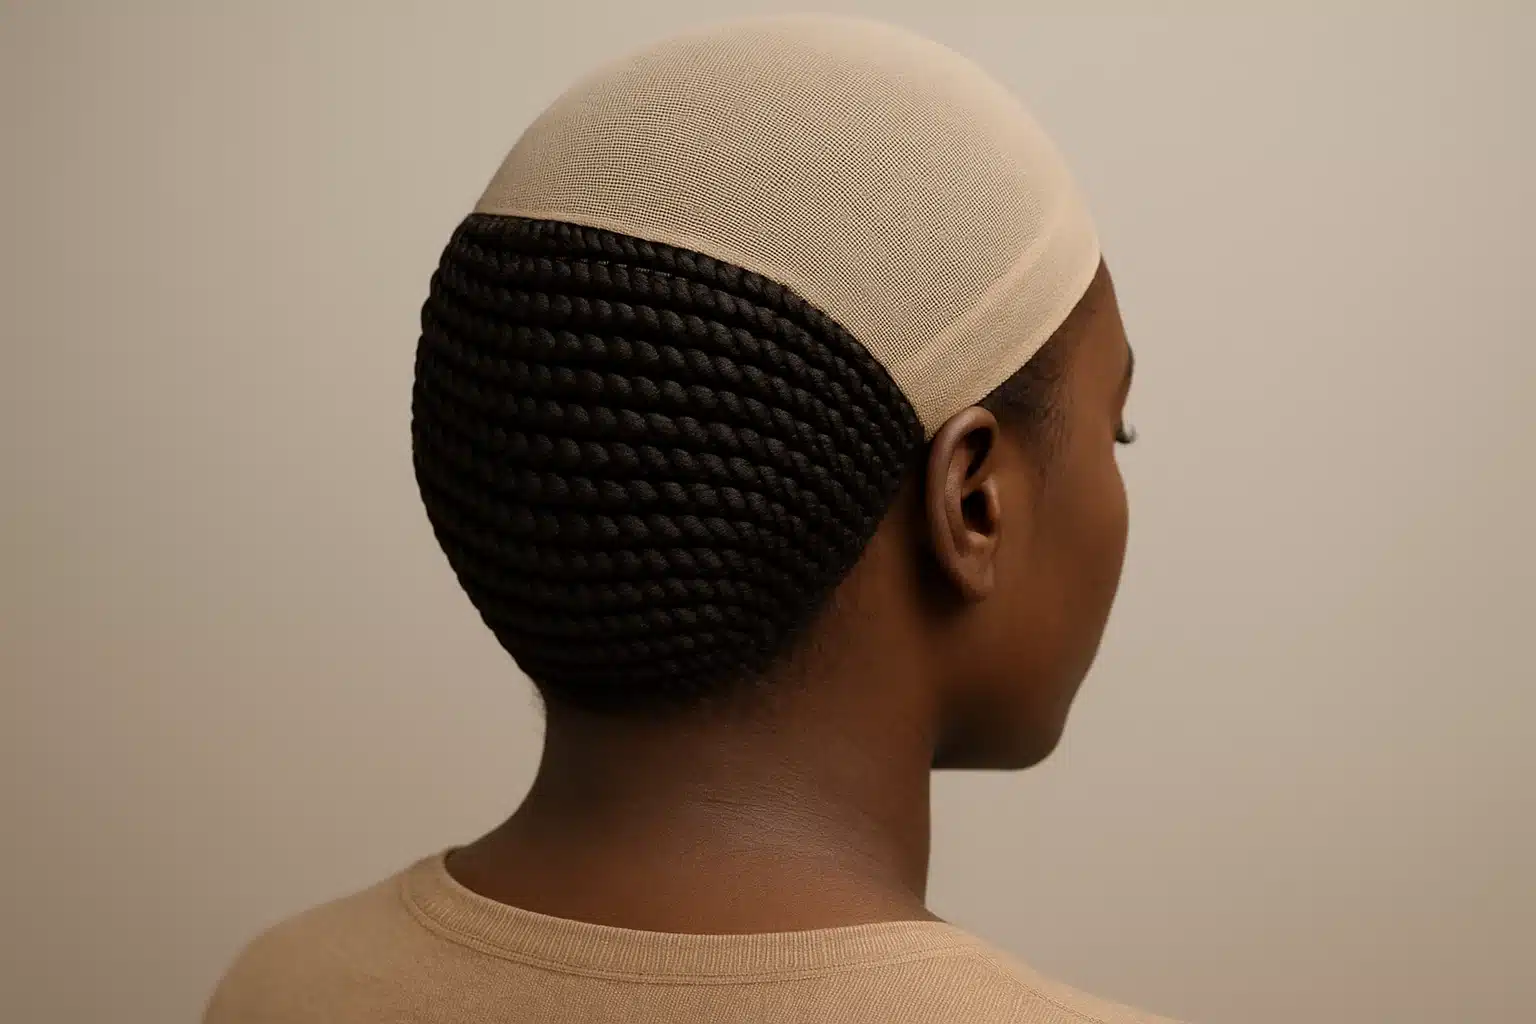
2. The Beehive Pattern (The Circle)
If your hair is very long, straight-back cornrows create very long tails that end up bunching at your neck. The Beehive solves this by making the entire head a continuous braid.
The Technique:Start a single braid at the center of your head or near the ear. Braid in a continuous spiral motion, working your way inward or outward (depending on preference) until all hair is incorporated.
Why It Works for Volume:It spreads the hair density across the entire surface area of the skull. There is no start or stop point that creates a lump. It creates a uniform surface that mimics the shape of the head perfectly.
3. Flat Twists
For those who find cornrows too difficult to maneuver or too tight on a sensitive scalp, flat twists are a gentler alternative.
The Technique:Similar to cornrows, you section the hair in rows. However, instead of using three strands to braid, you use two strands, twisting them over one another while picking up hair from the scalp as you go.
Pro-Tip:Twists can unravel faster than braids. To secure them, use a small amount of styling gel or edge control on each section before twisting. This keeps the style smooth and prevents “frizz halo” which can snag on the underside of your wig cap.
4. The Slick-Down (The No-Braid Method)
If you cannot braid, or if your hair is too short to grip, you can still achieve a flat look using the molding method. This is also excellent for those dealing with hair thinning who want to avoid the tension of braids.
The Technique:
- Dampen the hair and apply a firm-hold styling gel or setting lotion.
- Brush the hair flat against the head. For longer hair, wrap it in a circular motion around the head (a “doobie wrap”).
- Place a wig cap carefully over the wet/damp hair.
- Allow the hair to dry completely (using a blow dryer on a cool/warm setting) before putting on the wig.
Why Drying Matters:Never put a wig on top of damp hair. This can breed bacteria and cause odors. The hair must be “set” flat and dry to create that hard, shell-like foundation.
Troubleshooting Common Problems
Even with the right pattern, you might encounter hurdles. Here is how to navigate the most common issues:
The “Nape Bulge”
If your wig looks great at the front but sticks out at the neck, your braid tails are likely bunched up.
- The Fix: Do not tuck all your ends into one pocket. Cross them over each other like shoelaces and pin (or sew) them flat against the scalp.
The “Slipping” Wig
Sometimes, thick hair is slippery, causing the wig to slide back.
- The Fix: A velvet wig grip band is a game-changer. It creates friction against your hair (or wig cap) and holds the wig in place without adhesives.
Tension Headaches
If your brow aches after an hour, your foundation is too tight.
- The Fix: Your braids should feel snug, not painful. If you see your skin pulling tightly at the temples, take it down. Constant tension can lead to traction alopecia (hair loss from pulling), which defeats the purpose of protective styling.
Frequently Asked Questions
Can I wear my wig without a wig cap?
Yes, absolutely. Some people find wig caps restrictive or hot. If your braids are neat and flat, you can place the wig directly over them. However, a cap does help to keep stray hairs contained and creates a uniform color underneath the lace, which can look more realistic.
How often should I take down my braids?
For the health of your scalp and natural hair, it is recommended to undo your foundation every 1-2 weeks. This allows you to wash your scalp, moisturize your hair, and prevent matting.
Will these techniques work for a 100% hand-tied wig?
Hand-tied wigs are incredibly lightweight and flexible, which means they conform exactly to your head shape. This makes a flat foundation even more critical, as hand-tied caps will show lumps more easily than a traditional wefted cap. The Beehive method is often the best choice for hand-tied wigs as it creates the smoothest surface.
The Path to Confidence
Mastering the foundation takes practice. Your first set of cornrows might not be salon-perfect, and that is okay—they are going to be covered, after all! The priority is keeping your hair healthy, your scalp comfortable, and your silhouette natural.
By taking the time to prepare your natural hair properly, you aren’t just putting on a wig; you are crafting a look that allows you to walk out the door feeling beautiful, secure, and authentically you.


