We’ve all had that moment of hesitation in front of the mirror. You’ve just purchased a beautiful new unit, put it on, and while the style is gorgeous, something feels… slightly off. Perhaps the hairline feels a bit too dense, or the lace looks a little too much like, well, lace. This is the most common hurdle for wig wearers transitioning from “wearing a wig” to “rocking a style.”
The secret to that seamless, “is that her real hair?” look isn’t necessarily buying the most expensive human hair unit on the market. It lies in the art of personalization. While Outre has revolutionized the synthetic market with their pre-work—which you can read about in The Definitive Guide to Outre Wigs: From Melted Hairlines to Perfect Curls—truly owning the look requires a few finishing touches tailored specifically to you.
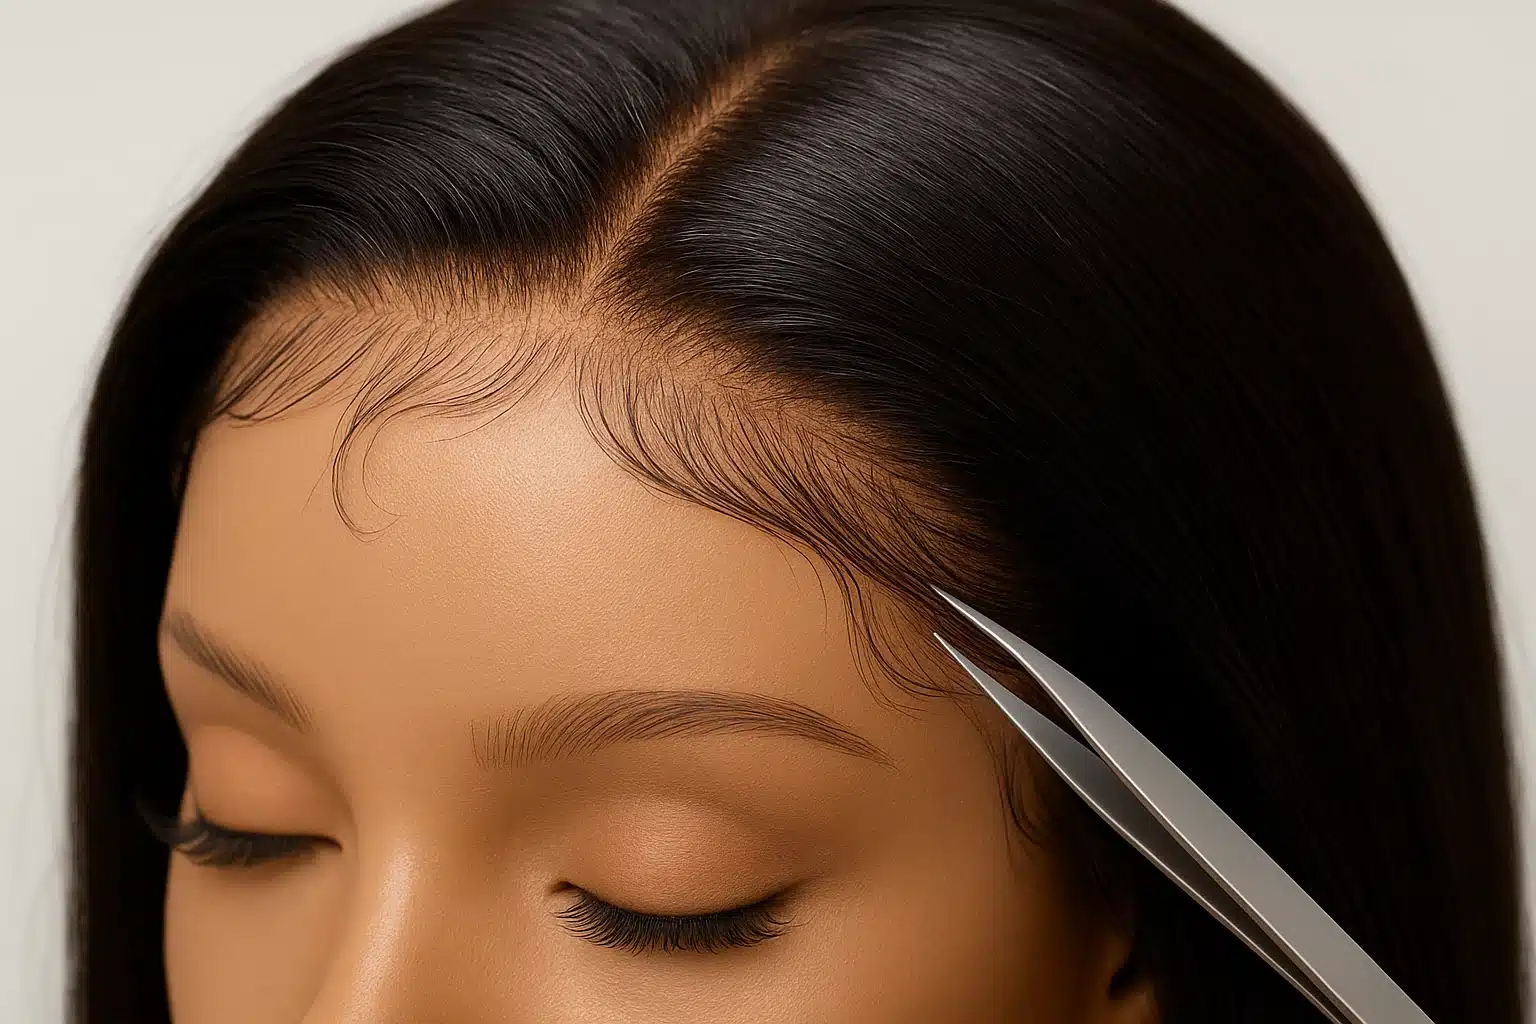
Detailed plucking techniques are essential for anyone following the guide above to ensure a flawless install. While Outre’s Melted Hairline series offers a head start, achieving true realism requires mastering the balance between plucking density and tinting lace to disappear against your unique skin tone.
The Anatomy of Outre Lace: Understanding Your Canvas
Before you pick up a pair of tweezers, it is vital to understand the material you are working with. Customizing a synthetic Outre wig is fundamentally different from working with human hair.
Outre wigs, particularly the Melted Hairline and Perfect Hairline series, utilize High Tex synthetic fibers. These fibers have “memory,” meaning they hold their style through weather and wear, but they also have physical limits. Unlike human hair, you cannot bleach the knots of a synthetic wig. The chemicals required to lift pigment from human hair will permanently damage synthetic fibers and melt the lace structure.
Therefore, our goal isn’t to chemically alter the wig, but to physically sculpt it. We are looking for “optical illusions”—using density reduction and color theory to trick the eye into seeing a natural scalp.
The Architect’s Toolkit
To achieve a professional result at home, you need the right tools. Standard flat-tip tweezers from a drugstore manicure kit often lack the precision required for wig customization and can accidentally tear delicate HD lace.
Your Essentials:
- Slanted or Pointed Tweezers: Professional grade. The sharp point isolates single strands, while the slanted edge allows for “sweeping” removal.
- Fabric Scissors or Shears: For cutting lace cleanly without fraying.
- Lace Tint Spray or Powder Foundation: To match your skin tone.
- Styling Foam/Mousse: To manipulate the baby hairs.
- Mannequin Head & T-Pins: To secure the wig while working.
Phase A: The Art of Plucking (The Sparse Effect)
Most wigs come with a hairline that is universally dense. However, natural hair growth is rarely a solid wall of hair; it creates a soft gradient, starting sparse at the very edge and thickening as it moves back.
The “Dry vs. Wet” Plucking Debate
While many stylists pluck human hair wet, the safest method for Outre synthetic units is actually wet plucking, or at least damp plucking. Wetting the hairline with a spray bottle lubricates the knots, allowing them to slip out of the lace grid more easily without stretching or tearing the delicate lace material.
Step-by-Step Density Reduction:
- Sectioning: Clip the bulk of the hair back, exposing only the hairline.
- The “Behind the Line” Technique: Do not start plucking the very front edge immediately. Instead, part out a thin section of the very front hairline (about 2-3mm) and clip it forward. You want to pluck behind this front perimeter first. This prevents you from creating bald spots right at the front.
- The Angle Matters: Use the flat back of the tweezers against the head, not the point digging into the lace. Pull the hair in the direction it is ventilated (usually away from the face).
- Create Valleys, Not Lines: Focus on the temples. Natural hairlines are usually thinner at the temples and denser toward the middle. Pluck every other hair in small sections to create a gradient effect.
The “Aha” Moment: Periodically try the wig on or hold it up to the light. You are looking for a gradual fade, not a stark line. If you can see through the hair to the lace clearly in a random pattern, you are achieving realism.
Phase B: Tinting Science (The Scalp Illusion)
Creating the illusion of scalp on synthetic lace requires a different approach than human hair because synthetic material is non-porous.
Human hair lace can absorb dye effectively. Synthetic lace, however, is like plastic—it doesn’t “drink” the liquid dye; the pigment merely sits on top. This is why traditional boiling methods often fail or wash out immediately on synthetic units.
The Tinting Process:
- Foundation Method: The simplest way to tint is to use a powder foundation that matches your skin tone exactly. Flip the wig inside out and press the powder into the lace grid using a brush. This helps hide the grid knots.
- Lace Tint Sprays: These are formulated to adhere to the surface of the lace. Spray the backside of the lace (not the hair) and dry it with a blow dryer on a cool setting.
- The Check: Place the lace against your inner forearm. If it disappears against your skin, you have the right shade. If it looks gray or ashy, you need a warmer/darker tint.
Phase C: Baby Hair Architecture
“Baby hairs” are meant to look like new growth—fine, wispy, and short. A common mistake is leaving them too long or too thick, creating what looks like short bangs rather than natural breakage or new growth.
Creating Wisps, Not Blocks:
- Isolate Thin Sections: Pull out a very thin layer of hair along the perimeter. It should be transparent enough to see through.
- The “Correcting Cut”: Do not cut straight across. Use a razor comb or hold your scissors vertically (point cutting) to create jagged, uneven ends. This mimics the natural texture of new hair growth.
- Swoop and Set: Use a styling mousse and a small edge brush (or even a toothbrush) to swoop the hairs into a shape that complements your face.
- Tie It Down: This is crucial. Use a silk scarf or melting band to tie down the edges while the mousse dries. This “melts” the lace into the skin and sets the baby hairs flat.
The 4-Finger Rule: Mastering Placement
Even a perfectly customized wig will look unnatural if placed incorrectly. A major authority builder in the wig community is understanding the 4-Finger Rule.
Place four fingers horizontally on your forehead, starting from your eyebrows. Your wig’s hairline should generally sit where your top finger rests.
- Too Low: Placing the wig on the middle of your forehead creates a “helmet” effect and shrinks your face.
- Too High: Placing it too far back exposes your wig cap or bio hair and looks like the wig is sliding off.
Troubleshooting: Saving the Style
We have all been there—you got carried away and plucked a little too much. Because synthetic hair doesn’t grow back, panic sets in. But don’t worry, there are fixes.
- The Over-Plucked Spot: If you create a bald patch, use a dark eyeshadow or root touch-up powder on the lace in that specific area. This mimics the shadow of hair follicles and disguises the gap.
- The Lifting Lace: If your lace edges are curling up, clean the skin with alcohol to remove oils before applying your adhesive or gel. Synthetic lace has memory; if it dries curled, it stays curled. Reset it by wetting the lace and tying it down flat with a melting band until dry.
Your Journey to Flawless Hair
Customizing an Outre wig is a journey of trial and error. The beauty of these high-quality synthetic units is that they offer an affordable canvas for you to practice and perfect your technique. By understanding the science of the fiber and the art of the illusion, you transform a product into a personal style statement.
Remember, the goal isn’t perfection—it’s personalization. Your hairline is unique, and now, your wig can be too.
Frequently Asked Questions
Q: Can I bleach the knots on my Outre synthetic wig?
A: No. Synthetic fibers and lace will be damaged by bleach. Instead, use the plucking methods described above and use foundation or lace tint to conceal the knots.
Q: How often do I need to re-tint the lace?
A: Since tint sits on top of synthetic lace rather than absorbing into it, you may need to touch up the tint with spray or powder every 2-3 wears, or whenever you wash the unit.
Q: My baby hairs look stiff. How do I fix them?
A: You may be using too much gel. Try using a lightweight mousse instead. If they are already stiff, spritz them with water and gently comb them out to soften the look, then reset with a lighter product.


