For nearly twenty years, we have walked alongside thousands of women navigating the journey of hair loss. We understand that when you are evaluating a wig, your primary concern isn’t just about style or color—it is about confidence. The true measure of a high-quality wig is its ability to go unnoticed. You want a solution that doesn’t just sit on your head but feels like an extension of your identity.
The difference between a wig that looks “good” and one that looks undeniably real often lies in the customization. While the market for wigs and extensions is projected to reach nearly $21 billion by 2035, the most satisfied customers are those who master the subtle art of blending. Whether you are looking at HD lace options or premium synthetic fibers, achieving a seamless hairline is the key to wearing your hair with absolute assurance.
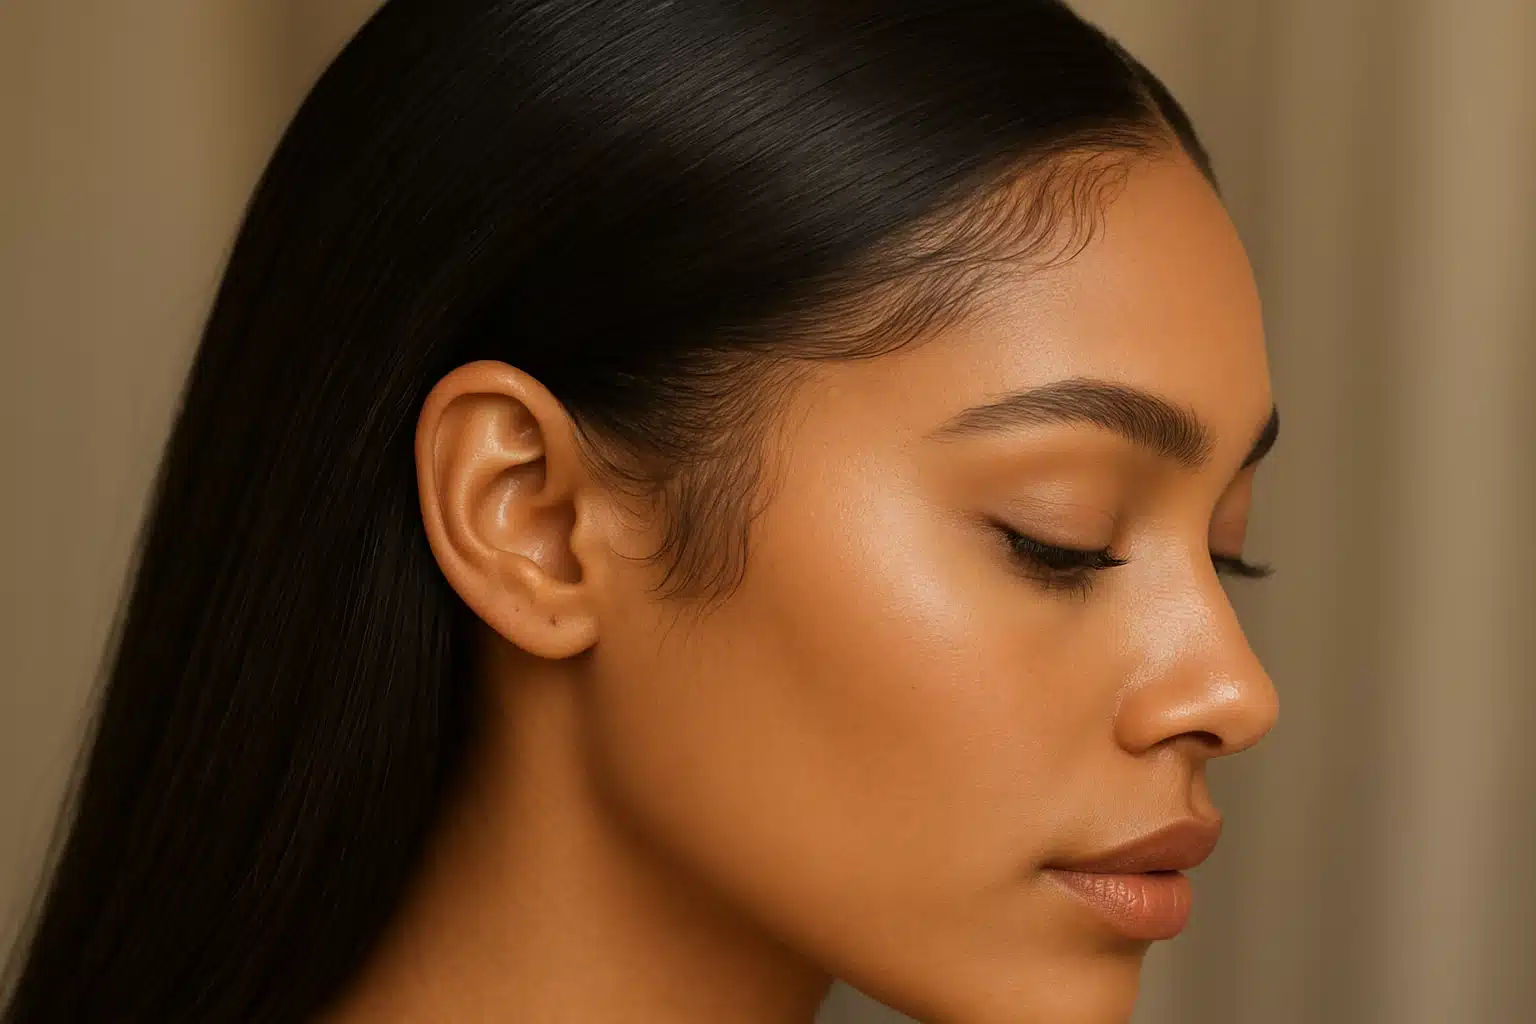
The Foundation of Realism: Customizing the Hairline
Most high-quality wigs come with a “pre-plucked” hairline, but manufacturers intentionally leave these slightly dense to allow for personal customization. A natural hairline is never a perfect, solid line; it is a soft, graduated transition where density builds slowly away from the forehead.
The “Gradation” Plucking Technique
To mimic biological hair growth, you must disrupt the uniformity of the wig’s edge. This process involves using tweezers to remove single strands of hair from the lace frontal to reduce density.
- Zone 1 ( The Very Edge): This should be the sparsest area.
- Zone 2 (The Transition): Slightly thicker, bridging the gap between the edge and the main body.
- Zone 3 (Full Density): Where the hair creates the bulk of the style.
Wet vs. Dry Plucking: Which is Right for You?
Our analysis of top-tier tutorials reveals a debate between wet and dry plucking. Understanding the distinction is vital for protecting your investment.
- Wet Plucking: Ideal for beginners. wetting the hair makes the knots more pliable and allows you to see the scalp clearly. It reduces the volume, helping you focus strictly on the roots. This method minimizes the risk of tearing the lace.
- Dry Plucking: Preferred by advanced stylists for seeing the “real-time” results of how the hair will lay when styled. However, it carries a higher risk of over-plucking if you aren’t careful.
Expert Tip: Always pluck effectively by grabbing the hair near the root, not the tip, to avoid breaking the hair shaft which leaves behind unsightly “stubble” on the lace.
Baby Hairs: The Subtle Art of Imperfection
Nothing gives away a wig faster than a hairline that is too clean. Biological hair has “baby hairs”—finer, shorter hairs around the perimeter. Recreating these is a powerful technique for concealment.
Creating Natural Edges
To create believable baby hairs, separate a very thin section of hair along the hairline (no more than a few millimeters deep). Trim these hairs to roughly one inch in length using a razor comb rather than scissors; the razor creates a tapered, feathered end that looks grown-out rather than bluntly cut.
Styling for Camouflage
Once cut, these shorter hairs can be swept down and swooped to cover the transition line where the lace meets your skin. This is particularly effective when wearing low ponytail hairstyles for black hair, where the hair is pulled back, exposing the entire perimeter of the hairline. By styling baby hairs to lay flat against the skin using a clear edge control gel, you create a visual barrier that distracts the eye from the lace grid.
Adhesive Mastery: Keeping It Secure and Invisible
The “melt” is the holy grail of wig wearing—the moment the lace disappears entirely into the skin. While glueless wigs are trending for their comfort, many wearers prefer the security of adhesives for long-term wear.
The Thin Layer Rule
A common mistake during evaluation is assuming more glue equals a better hold. In reality, thick layers of glue turn white and cakey. The secret is applying multiple ultra-thin layers of adhesive. Allow each layer to turn clear and tacky before applying the next. This transparency is what allows the lace to take on the appearance of your scalp.
Tapes and Alternatives
For those sensitive to liquid adhesives, double-sided tapes offer a viable alternative. Just as you might use pink tape in hair extensions to add a vibrant pop of color or volume to bio hair using a sandwich method, wig tapes use a similar medical-grade adhesive technology to bond lace to skin. They provide a strong anchor points without the mess of liquid glues, though they require precise placement to avoid visible ridges.
Blending Wigs with Different Natural Hair Textures
One of the most overlooked aspects of blending is texture matching. If you are leaving any of your biological hair out (a “leave-out”), or simply want the wig to match your eyebrows and sideburns, texture harmony is essential.
- Straight & Wavy: These textures are generally easier to blend but require precise color matching.
- Curly & Coily: This requires more strategic manipulation. If your wig is a Type 3 or 4 curl, but your natural edges are different, you may need to use twist-outs or specific curling wands on your natural hair to match the wig’s pattern.
For fully protective styles where no hair is left out, consider using a wig cap that matches your skin tone perfectly. This “bald cap method” ensures that when the lace parts, it reveals a tone that looks like skin, not your natural hair color underneath.
Troubleshooting Common Blending Issues
Even with the best techniques, challenges arise. Here is how to handle them:
- The “Grid” is Visible: If the lace pattern is visible, the lace color may not match your skin tone. A lace tint spray or a powder foundation applied to the underside of the lace can warm up or cool down the lace tone to match your complexion.
- Over-Plucking: If you have thinned the hairline too much, creating a bald patch, don’t panic. You can ventilate (tie) new hair into the lace if you have the tools, or more simply, change the parting to cover the sparse area.
- Lifting Edges: If the ear tabs or nape start lifting, use a little rubbing alcohol to clean the skin (removing oils) and re-apply a small dot of adhesive. Do not layer fresh glue over old, dirty glue.
Frequently Asked Questions
How often should I pluck my wig?
You should only need to pluck a wig once, when you first receive it. Plucking is a permanent customization. Over time, wigs naturally shed, so the density will decrease on its own.
Can I damage the lace by plucking?
Yes. Lace is delicate. If you pull too hard or try to pull too many hairs at once, you can rip the lace. Always use high-quality, slanted tweezers and pull one hair at a time in the direction of hair growth.
Do I really need to glue my wig down?
Not necessarily. Many modern wigs come with adjustable bands, combs, and velvet grips that allow for a secure “glueless” fit. However, for a truly seamless “melted” look where the lace is invisible from inches away, a light adhesive or gel is often recommended.
Confidence in Every Strand
Mastering these blending techniques transforms a wig from a simple hairpiece into a source of empowerment. By taking the time to customize the hairline, manage the baby hairs, and apply the wig correctly, you eliminate the fear of detection. You are no longer just wearing a wig; you are wearing a style that is uniquely yours.
We invite you to explore our curated collection of high-quality wigs, designed with the finest materials to give you the perfect canvas for your customization journey.


