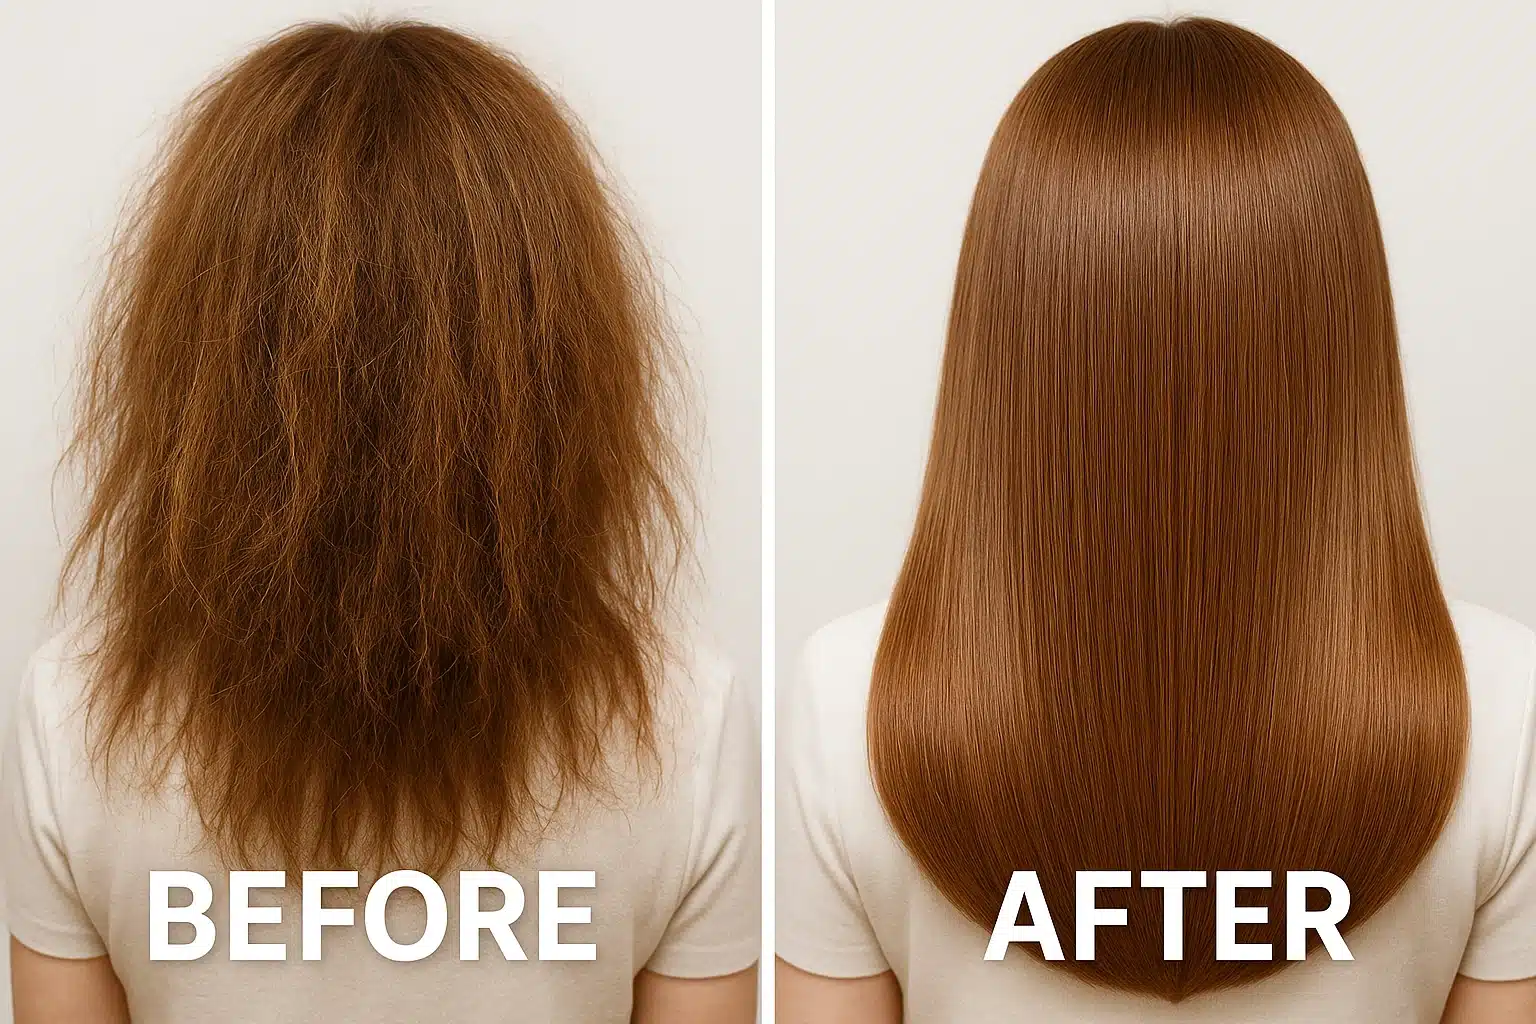
We’ve all been there. You have that one wig—the one that made you feel unstoppable the first time you wore it. It was silky, it moved beautifully, and it felt like you. But after months of wear, frequent friction against winter coats, and perhaps a bit of neglect, it’s beginning to look less like a high-end hairpiece and more like a bird’s nest. The fibers at the nape are matted, the ends are frizzy, and running a comb through it feels like a risky surgical procedure.
It’s a heartbreaking moment when you consider throwing it away. But before you toss it, know that with the right advanced synthetic wig transformation & re-texturing techniques, you can often bring even the most damaged pieces back to life. Restoring a synthetic wig isn’t just about detangling; it is about understanding the material science of the fibers and using heat and hydration to fundamentally reset their structure.
The Science of the “Rat’s Nest”: Why Synthetic Wigs Fail
To fix the problem, you first have to understand what is happening on a microscopic level. Unlike human hair, which is organic protein, synthetic wigs are comprised of fine plastic fibers—often materials like Kanekalon, polyester, or acrylic.
While these fibers are designed to mimic the movement of hair, they lack the natural oils that keep human hair flexible. The primary enemy of synthetic fiber is friction. Every time you turn your head, the fibers rub against your collar, your skin, or your chair. This creates two problems:
- Static Electricity: This causes fibers to repel each other and tangle.
- Fiber Degradation: Under a microscope, a damaged synthetic fiber looks like a frayed rope. The smooth outer coating scrapes off, leaving a rough texture. These rough fibers act like Velcro, latching onto each other to create those stubborn, dreadlock-style mats at the nape of the neck.
Understanding that you are dealing with plastic rather than hair is the “aha moment” necessary for restoration. You cannot “heal” plastic, but you can smooth and remold it.
The Wig Triage: Assessing the Damage
Before you start pulling at knots, you need to diagnose the severity of the damage. Treating a slightly dry wig with aggressive heat techniques can do more harm than good.
Level 1: The Dry Frizz
- Symptoms: The wig lacks shine and feels slightly rough to the touch, specifically at the ends.
- Solution: Silicone-based sprays and gentle steaming.
Level 2: The Nape Nest
- Symptoms: The top looks fine, but the layer underneath at the neck has formed a solid clump.
- Solution: Sectioning, targeted steaming, and the “bottom-up” comb out.
Level 3: The Critical Condition
- Symptoms: You cannot run your fingers through the wig at all. It stands up on its own. It looks dull and lifeless.
- Solution: The “fabric softener” soak and hot-tool resurfacing.
The Toolkit: Beyond the Brush
You likely have a wide-tooth comb, but for advanced restoration, you will need a more specialized toolkit.
- A Steamer: The MVP of wig restoration. A simple handheld clothes steamer works wonders.
- Canvas Block Head & T-Pins: You need tension to detangle effectively.
- Silicone-Based Wig Spray: To provide slip.
- A Flat Iron (with adjustable temp): For the advanced resurfacing technique.
- Fabric Softener: For the chemical soak method (use cautiously).
Method 1: The Steam Reset (Best for Texture Restoration)
Heat is usually the enemy of synthetic hair, but controlled moist heat is its savior. Steam relaxes the plastic fibers, allowing them to return to their original, smooth shape without melting them.
- Secure the Wig: Pin your wig securely to a canvas block head.
- Apply Tension: Gently pull a section of hair taut.
- Steam and Smooth: Run the steamer over the fiber while combing through it with a fine-tooth comb. The steam heats the fiber, and the comb realigns the microscopic frays.
- Cool Down: This is crucial. Hold the fiber straight until it cools. Plastic sets as it cools, locking in the smoothness.
Method 2: The “Fabric Softener” Soak (The Deep Condition)
This is a favorite technique among cosplay communities and wig enthusiasts for reviving older wigs that feel stiff and crunchy. Since synthetic hair can’t absorb conditioner, fabric softener acts as a lubricant to reduce static and soften the plastic.
- The Mix: Fill a basin with cool water and add a cup of fabric softener.
- The Soak: Submerge the wig completely. Let it sit for at least an hour (some prefer overnight for severe cases).
- The Rinse: Rinse gently with cool water. Pro-Tip: If the wig is extremely matted, don’t rinse it completely clean; leaving a tiny trace of softener can act as a leave-in detangler.
- The Dry: Never wring it out. Squeeze gently in a towel and let it air dry on a wig stand.
Note: This method is great for softness, but it can leave a film if not rinsed well, which attracts dust later. Use this as a periodic deep treatment, not a weekly routine.
Method 3: The Flat Iron Resurfacing (The Advanced Fix)
If your wig has “crinkled” ends that look like they’ve been singed, steaming might not be enough. You need to physically iron out the damage. Warning: Check if your wig is “heat-friendly.” If not, you must use the lowest setting (usually below 180°F or 80°C) or use the steam method instead.
- The Chase Method: Take a small, thin section of hair. Place a fine-tooth comb at the root, and follow it immediately with the flat iron.
- The Motion: Move slowly down the hair shaft. The comb aligns the fibers, and the heat creates a new, smooth surface memory.
- The Trim: Sometimes, the last inch of the fiber is simply too shattered to save. A tiny trim of the dead ends after straightening can make the wig look brand new.
Maintenance: Keeping the Frizz at Bay
Once you have invested the time to restore your wig, you want to keep it that way.
- Rotation is Key: Just like shoes, wigs wear out faster if worn every day. Rotating between two pieces gives the fibers a “rest” and reduces the frequency of washing and styling.
- The Collar Defense: In winter, wear a silk scarf around your neck. This creates a barrier between the rough wool of your coat and the fragile nape of your wig.
- Proper Storage: Never toss a wig in a drawer. Gravity helps keeps the fibers straight; store it on a wig stand or hanging upside down if it’s long.
FAQ: Common Restoration Questions
Can I use regular hair spray on my synthetic wig?
No. Standard hair sprays contain alcohol and lacquers that will dry out and damage synthetic fibers, turning them brittle and white over time. Always use products specifically formulated for synthetic hair.
Why does the nape of the neck mat so much faster than the rest?
This is the “high friction zone.” The heat from your body combined with the constant rubbing against your neck and clothing creates the perfect storm for static and tangling.
Is there a point of no return?
Yes. If the fibers have been melted (crinkled and hard like fishing line) by high heat—like opening an oven door—they are fused. At that point, the only solution is to trim the damaged length or replace the unit.
Can I dye a faded synthetic wig?
Synthetic fibers are plastic, so they don’t accept traditional hair dye. While some DIYers use fabric dyes or acrylic ink methods, the results can be unpredictable and may stain your skin or clothes. It is generally safer to invest in a new piece if the color has faded significantly.
Ready to restore your confidence?
De-frizzing a wig is a labor of love, but the results can be incredibly rewarding. By treating your wig with the same care you’d give a delicate fabric, you extend its life and ensure you always look your best.
If you’ve tried these methods and your wig still isn’t bouncing back, it might be time to explore new options. Sometimes, the best feeling isn’t fixing the old, but discovering the new.


