Investing in a high-quality human hair wig is an exciting moment, but pulling it out of the box can feel a bit intimidating. If you’ve ever looked at a brand-new lace front wig and wondered why the hairline looks more like a dense, perfectly straight wall of hair rather than a natural scalp, you are not alone. That factory-finish density is standard, but wearing it straight out of the box is a surefire way to make your wig look like, well, a wig.
Achieving that flawless “melt” where the lace completely disappears into your skin isn’t magic; it is an incredible blend of chemistry and artistry. To truly elevate your piece from looking like a hairpiece to a genuine extension of your scalp, it helps to first understand the anatomy of a perfect wig, mastering hairline density and texture. This holistic design system is the foundation of a natural look. From there, the post-manufacturing customization process—bleaching, plucking, and baby hair design—is where your wig truly becomes your own.
If you’re feeling anxious about taking bleach or tweezers to an expensive investment, take a deep breath. We are going to break down the science and the art of wig customization into a foolproof, step-by-step masterclass.
The Anatomy of the Lace: Why Customization Matters
Before mixing any chemicals, we need to understand what we are working with. When you begin learning about what a lace wig actually entails, you’ll discover that individual hair strands are hand-tied to a delicate Swiss or French lace base.
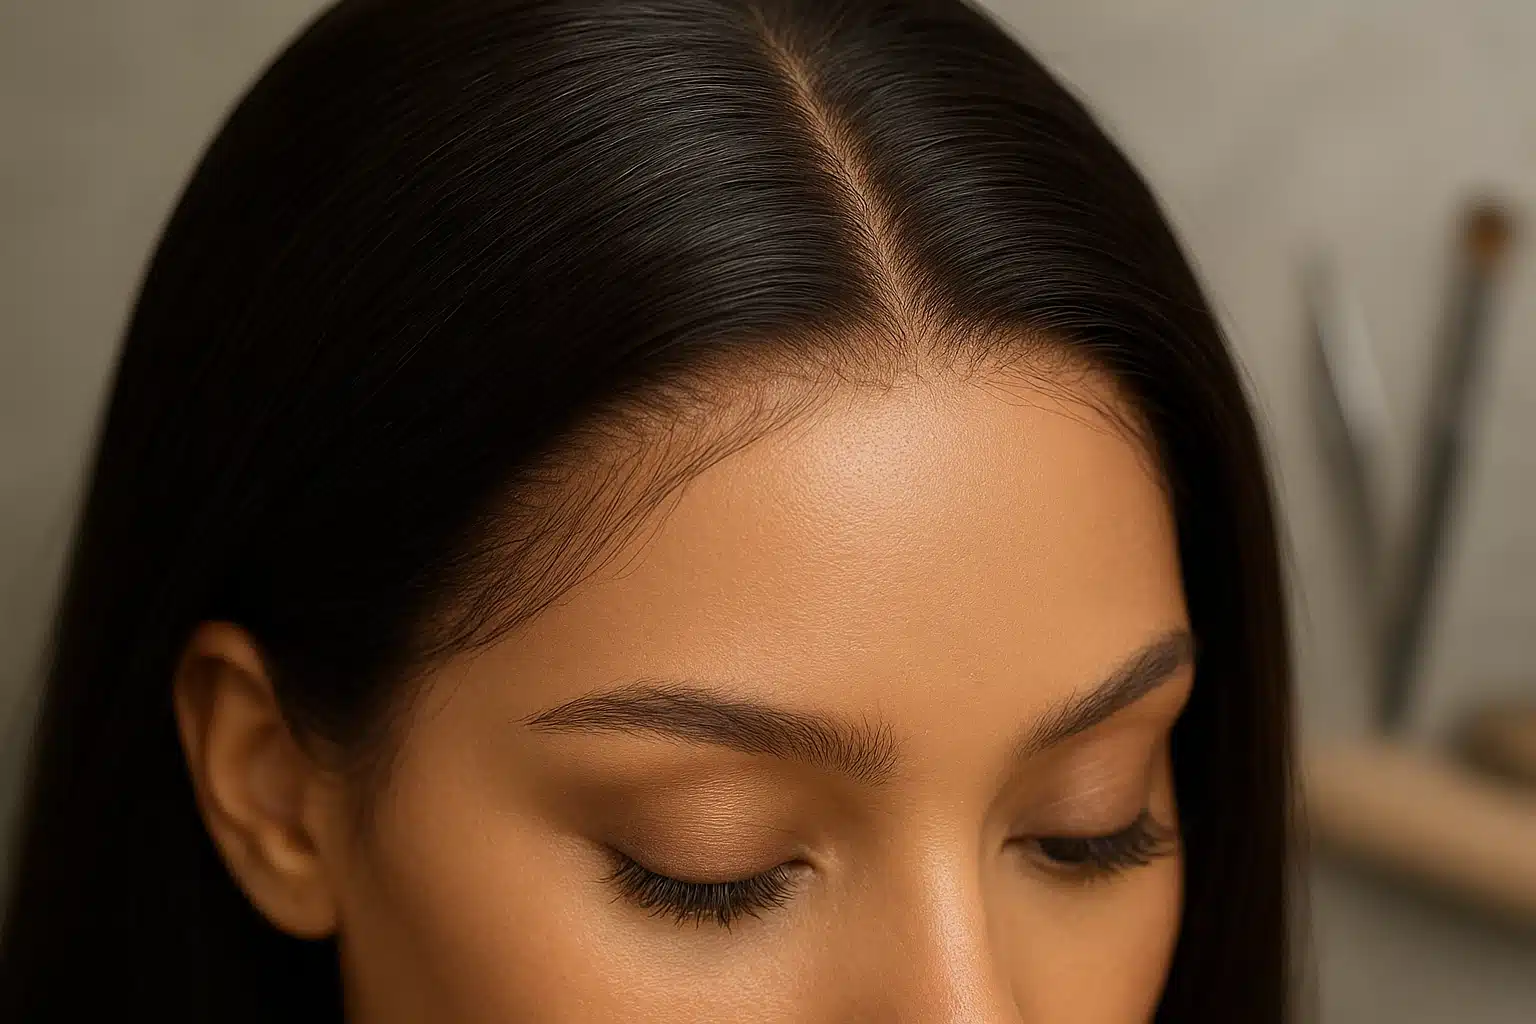
These tiny knots secure the hair, but they also leave visible black dots along your hairline, resembling tiny ants on the scalp. Furthermore, factories tie these hairs in a uniform density to ensure durability. However, a natural human hairline isn’t uniform—it’s a soft, irregular gradient. Customization is simply the process of erasing those knots and mimicking nature’s beautiful imperfections.
Module 1: Chemical Customization (Bleaching the Knots)
Bleaching the knots is the most transformative step, but it’s also the one that causes the most anxiety. The goal here is to lighten the tiny black knots at the base of the lace so they blend seamlessly with your skin tone.
The Science of the “Buttercream Frosting” Test
The number one mistake beginners make is mixing a runny bleach formula. Runny bleach seeps right through the microscopic pores of the lace and dyes the actual hair shafts blonde, resulting in unsightly “hot roots.”
To prevent this, you need a precise 1:1 ratio of bleach powder to developer (usually 20 or 30 Volume, depending on how dark the hair is). Your mixture must pass the Buttercream Frosting Test: when you scoop the bleach with a plastic spoon and hold it upside down, the bleach should hold its shape completely without dripping.
The Dabbing Technique
Once your mixture is thick and ready, use an applicator brush to gently dab or press the bleach onto the inside of the lace. Never spread or aggressively push the bleach into the lace like you’re buttering toast, as this will force the chemicals through the delicate mesh.
Chemical Post-Care Science
Bleach works by permanently altering the structural bonds of the hair. If you simply rinse the bleach out with water, the chemical reaction continues subtly, which will eventually cause massive shedding and bald patches on your wig. You must use a pH-neutralizing shampoo immediately after rinsing to completely halt the chemical process. Following up with a purple shampoo will also help tone down any brassy or orange hues left behind by the lightening process.
Module 2: Manual Customization (Strategic Plucking)
If bleaching is the chemistry, plucking is the artistry. Random plucking creates unnatural holes, while failing to pluck leaves you with a “helmet” effect.
Tool Selection and the “Step-Back” Rule
Put away the blunt drugstore tweezers and opt for professional needle-nose tweezers for maximum precision. As you begin, it is incredibly easy to fall into a “tweezers trance” where you just keep plucking. To avoid irreversible bald spots, employ the Step-Back Rule: Pluck exactly 10 hairs, physically step back three feet from your mannequin head, evaluate the density, and only then proceed.
The Three-Zone Mapping Guide
To create a realistic, soft gradient, imagine the front inch of your wig divided into three zones:
- Zone 1: The Soft Edge (0.5 cm): This is the very front of the hairline. It should be extremely sparse. Pluck individual hairs irregularly.
- Zone 2: The Transition (1.0 cm): Moving slightly back, use a staggered, alternating plucking method to mimic a natural fade.
- Zone 3: The Density Blend (1.5 cm+): Here, you want to maintain volume while thinning the bulk. Part the hair and pluck from the roots underneath rather than from the top surface layer.
Module 3: Facial Framing and Baby Hairs
Baby hairs are the ultimate illusion-maker, hiding the hard edge of the lace and framing the face beautifully.
The 4-Finger Placement Rule
Before cutting any baby hairs, ensure your wig is sitting in the correct position. Place the wig hairline exactly four fingers’ width above your eyebrow ridge. Placing it any lower creates a cramped, unnatural forehead.
The Eyebrow Razor Cut
Section out only the thinnest 2-3 mm of hair at your temples and natural parting. Never use scissors to cut baby hairs—scissors create blunt, chunky, fake-looking lines. Instead, take an eyebrow razor and slice downward at a sharp angle. This technique mirrors the naturally short, tapered, and broken-off look of real baby hairs.
The Ultimate Troubleshooting Guide
Even the pros make mistakes. Here is how to fix the most common customization errors without panicking.
- Mistake: Over-Bleached Blonde Roots. If your bleach seeped through and lightened the roots, don’t throw the wig away. Take a clean mascara wand (spoolie), dip it in semi-permanent dye matching the wig’s color, and carefully brush the dye only onto the affected roots.
- Mistake: Brassy, Orange Knots. If your knots didn’t lift to a pale blonde and are stuck at an orange stage, create a “water bath” using warm water and a generous squirt of purple shampoo. Dip the lace in for a few minutes to let the violet pigments neutralize the warm orange tones.
- Mistake: Over-Plucked Bald Spots. If you got carried away with the tweezers, you can camouflage the area by spraying a lace-tinting spray or tapping a powder foundation that matches your skin tone onto the lace. For the long term, mastering basic wig maintenance will help you preserve the delicate lace and avoid unnecessary shedding that exacerbates thin spots.
Frequently Asked Questions (FAQ)
Do I bleach the knots or pluck the hairline first?
Always bleach first. Plucking weakens the structural integrity of the lace slightly, and bleaching first allows you to easily target and pluck away any stubborn, bleach-resistant knots later.
Can I bleach the knots on a synthetic lace wig?
No. Synthetic hair is essentially made of highly advanced plastic fibers. Applying bleach will not lighten the color; it will only melt the fibers and destroy your lace. For synthetic wigs, rely on careful plucking and lace-tinting powders instead.
Should I pluck the wig wet or dry?
Wet plucking is highly recommended for beginners. Applying water and a little mousse allows you to see the true direction of the hair and the exact density of the knots, giving you much more control.
Embracing the Art of the Melt
Customizing a lace front wig is a beautiful, deeply personal process. By understanding the chemistry behind the bleach and the geometry behind the plucking, you are taking full control over your hair journey. Remember to take it slow, rely on your tools, and step back frequently to admire your work.
With patience and practice, you’ll soon be crafting hairlines so remarkably natural, the only person who will know it’s a wig is you.