You know that feeling when you first unbox a beautiful new wig, put it on, and look in the mirror only to feel… overwhelmed? It’s not the color, and it’s not the style—it’s the volume. You might feel like you’re wearing a “helmet” of hair rather than a natural style. This is one of the most common experiences for new wig wearers. The truth is, most high-quality wigs are manufactured with 10–20% more density than natural biological hair. This isn’t a flaw; it’s a feature designed to extend the lifespan of the piece as hair naturally sheds over time.
However, to make that piece feel like you right now, it often requires customization. While visiting a professional stylist is always a safe bet, understanding the principles of advanced wig cutting & layering techniques can empower you to personalize your look at home. Whether you are looking to simply reduce bulk or add subtle movement, mastering the art of precision thinning is the bridge between a “wig” and “your hair.”
The “Why”: Understanding Natural Density vs. Wig Density
To achieve a realistic look, we first have to understand how biological hair grows. Natural hair is rarely uniform. It tends to be finer around the hairline, lighter at the temples, and denser at the crown and back. Wigs, by contrast, are often hand-tied or wefted with consistent density throughout to ensure coverage of the wig cap.
When a wig looks “wiggy,” it is usually because the density is too uniform. The goal of thinning isn’t just to remove hair; it is to mimic the natural variances of biological growth. We want to create “internal layers”—shorter hairs hidden underneath longer layers—that support the shape without adding weight. This is the secret to eliminating the “helmet effect” and achieving that effortless sway.
The Toolkit: Essential Gear for Precision Thinning
Before you make a single snip, you need the right tools. Using standard kitchen scissors or dull shears is the quickest way to ruin a fiber.
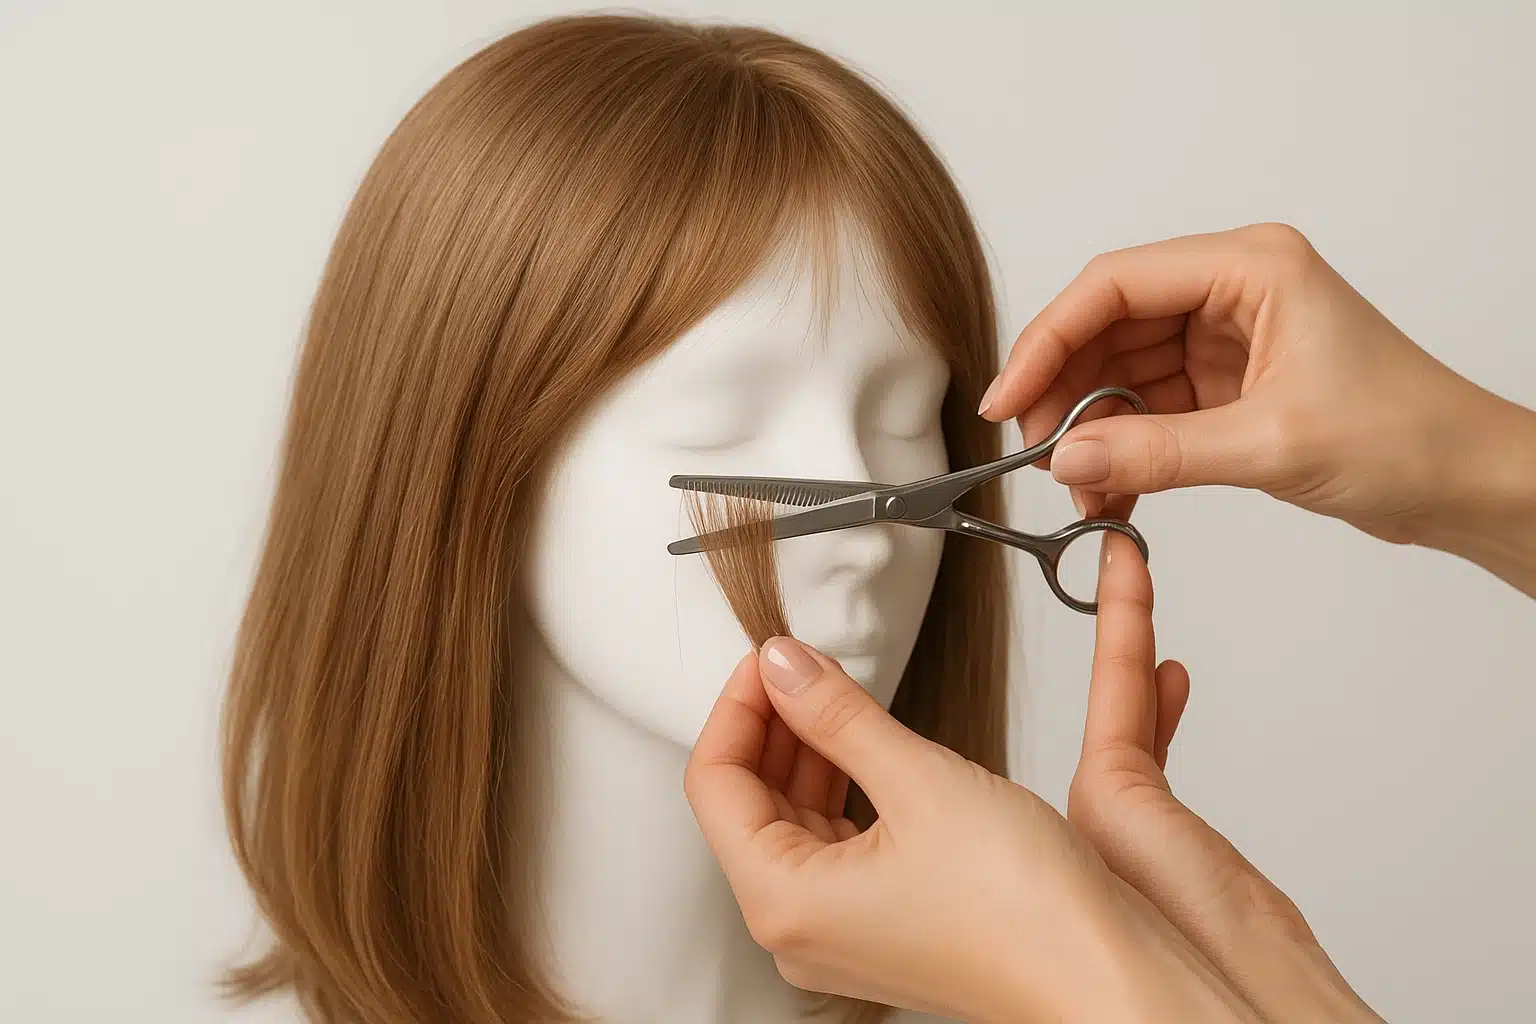
- Thinning Shears: These are your best friends. Unlike standard scissors that have two straight blades, thinning shears have one straight blade and one notched blade (with “teeth”). They only cut a percentage of the hair captured between the blades, allowing for soft diffusion rather than blunt, choppy lines.
- Sectioning Clips: Control is everything. You cannot thin a wig properly without sectioning the hair away to see exactly what you are working on.
- Wide-Tooth Comb: Essential for detangling and checking the fall of the hair after every few cuts.
- The Razor (Human Hair Only): A feather razor can create beautiful, soft shattered edges, but it requires a practiced hand. Note: Never use a razor on synthetic wigs. The scraping motion damages the fiber’s cuticle, leading to permanent frizz and tangling.
Critical Distinction: Human Hair vs. Synthetic Fiber
One of the most vital “aha moments” in wig customization is understanding fiber compatibility.
For Synthetic Wigs:Synthetic fiber is essentially a fine plastic. It is incredibly durable, but it does not react to cutting the way human hair does. When thinning synthetic hair, you must use sharp thinning shears. Avoid “slide cutting” or razoring, as these techniques stretch and shred the plastic filament, causing the ends to curl up and frizz immediately.
For Human Hair Wigs:You have more freedom here. Human hair can be texturized using point cutting (snipping vertically into the ends) or razoring to remove weight and add softness. However, because human hair doesn’t grow back, the “less is more” rule is paramount.
Step-by-Step: The Brick-Lay Method
The safest and most effective way to reduce bulk without leaving visible “holes” in the style is the Brick-Lay technique.
1. Protect the “Money Piece”
First, section off the top layer of hair (the part visible to the world) and clip it out of the way. Never use thinning shears on the very top layer of the wig. If you cut the top layer, you will see short, spiky hairs sticking up (often called “flyaways” or “stubble”) that are impossible to hide. The thinning happens underneath.
2. Create Your Zones
Create a horizontal section about an inch below the top layer. This is your first “work zone.”
3. The Cut
Take a small section of hair (about an inch wide). Place your thinning shears roughly 2 to 3 inches away from the root. Close the shears once, then open and remove them. Do not saw back and forth. Comb through that section to remove the loose hair.
4. Alternating Sections
Move to the next section, but skip a small amount of hair in between, just like laying bricks. This ensures you don’t create a concentrated thin spot. Work your way down the back and sides of the wig, always checking the density by dropping the top layer down to feel the difference.
Refining the Look: Face-Framing and Blending
Once the bulk is reduced, the final step in customization often involves softening the hair around the face. A dense, heavy line of hair right next to the eyes can look harsh.
By gently texturizing the area around the ears and temples, you create a seamless transition from the wig cap to your skin. This is particularly important for wig sideburns, which often need to be thinned significantly to lay flat against the head. If the sideburns are too thick, they can lift away from the face, revealing the construction of the wig. Gentle point-cutting in these areas helps the fiber hug the contours of your face naturally.
Troubleshooting: Avoiding Common Pitfalls
Even with the best intentions, mistakes can happen. Here is how to avoid the most common ones:
- The “Frizz” Effect: If your synthetic wig looks frizzy immediately after cutting, your shears may be dull, or you may have dragged the blade. Ensure your scissors are professionally sharpened.
- Visible Stubble: If you see short hairs sticking up through the style, you likely thinned too close to the top layer or the part line. To fix this, you may need to use a steamer (for synthetic) or styling wax to train these hairs to lay flat while they are hidden by longer layers.
- Uneven Density: If one side feels thinner than the other, don’t panic. Stop cutting. Wash the wig and let it dry. Often, product buildup or static can make density feel uneven. Re-assess with a fresh, dry wig before cutting more.
Frequently Asked Questions
Q: Can I un-thin a wig if I cut too much?
A: Unfortunately, no. Once the fiber is cut, it’s gone. This is why we recommend the “10% Rule”: Only remove about 10% of the volume you think you need to remove, then wear the wig for a day. You can always cut more later, but you cannot put it back.
Q: Will thinning shears damage my wig?
A: If used correctly (sharp blades, proper technique), no. However, over-thinning can compromise the structural integrity of the style, making the wefts visible.
Q: Is this safer to do on toppers or full wigs?
A: The technique is the same, but be extra careful with hair toppers. Because toppers have less hair overall than full wigs, a small mistake is more visible. Proceed with extreme caution and smaller sections.
Taking the Next Step
Transforming a dense, box-fresh wig into a customized style that frames your face perfectly is a journey. It requires patience and a willingness to learn the unique language of hair fiber. Remember, the goal is not perfection—it’s personalization. By removing the excess weight, you aren’t just styling a wig; you’re revealing the confidence underneath.


