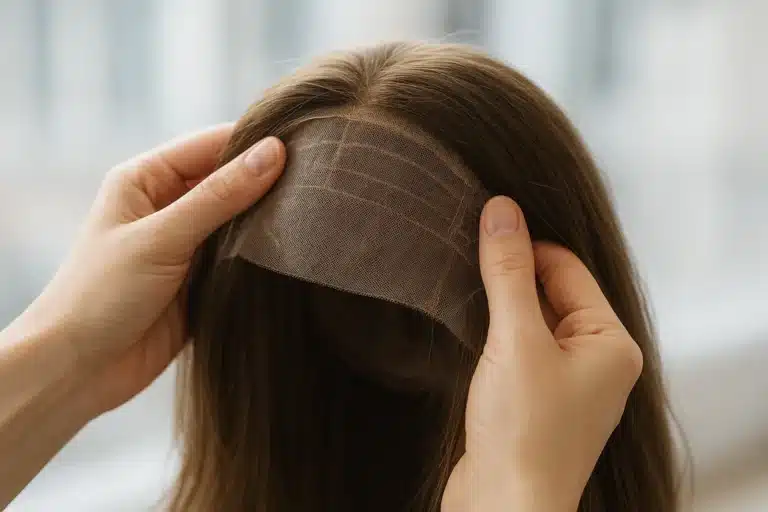

We’ve all experienced that split-second moment of panic. You turn your head a little too quickly, a gust of wind catches you off guard, or you simply look down to check your phone—and suddenly, you feel that dreaded creeping sensation. Your wig is shifting. For many wig wearers, the immediate reaction is to slather on more adhesive or tighten the internal straps to their maximum limit, hoping for the best.
But here is a fundamental truth about wig wearing that can completely transform your experience: security isn’t just about the products you use; it’s about understanding the anatomy of your own head. Mastering the fit at these specific high-movement tension points requires a solid baseline understanding of how different attachment methods work. If you are starting from scratch, reading a complete guide to wig security featuring adhesives, tapes, and glueless methods is an excellent first step before diving into the targeted, anatomical solutions we are going to explore.
By shifting our focus from “general wig security” to “anatomical security,” we can eliminate the guesswork and ensure your hair stays comfortably and flawlessly in place all day long.
The Anatomy of the Slip: Why Wigs Move
To stop your wig from slipping, you first need to understand why it happens. Most generic advice treats the entire perimeter of a wig as a single unit. However, the human head is dynamic. As you talk, chew, smile, and look around, the muscles around your temples and the base of your neck are constantly contracting and expanding.
Because of these distinct movements, wig slippage generally falls into two categories:
- The “Ride Up”: This happens at the nape of the neck when looking up or down.
- The “Slide Back”: This happens at the front hairline and temples, usually exacerbated by facial expressions or heavy styling.
Addressing these issues requires a mix of passive security (having the right cap size and strap adjustment) and active security (using grips, tapes, or adhesives).
The Nape: Finding Your Occipital Anchor
One of the most common mistakes in wig application is pulling the back of the wig down as far as it will go, allowing it to rest directly on the neck. This practically guarantees slippage. Why? Because the neck is a cylinder of moving muscles.
Instead, your wig needs to rest against your occipital bone—the slight bony curve or “bump” at the lower back of your skull. When your wig sits slightly below this curve, the bone acts as a natural shelf that prevents the wig from riding up.
If you’ve ever found yourself asking what are the straps inside a wig for, their primary purpose is to gently cup this exact bone. They are not meant to act as a tight tourniquet around your skull.
The Tension Trap and Traction Alopecia
There is a dangerous misconception that “tighter equals more secure.” Over-tightening your adjustable nape straps is what we call the Tension Trap. When straps are too tight, they stretch the cap flat against the natural curve of your occipital bone. As a result, the wig loses its anatomical anchor and “pops” up the moment you bend your neck. More importantly, excessive tension around the perimeter is a leading cause of traction alopecia—damage to your biological hair and scalp from persistent pulling. A secure wig should hug your head, not squeeze it.
The Temples: Managing Lateral Movement
While the nape is prone to vertical movement (riding up), the temples are the primary “failure zone” for lateral (side-to-side) and backward movement.
Many educators teach the “4-Finger Rule” for placement: placing four fingers horizontally above your brow bone to find where your natural hairline should begin. However, this rule doesn’t account for the curvature of your forehead or temples. If your temples slope back sharply, the ear tabs of your wig can easily lift.
For this highly mobile area, introducing a high-friction barrier is incredibly effective. Using a suction silicone wig cap or a specialized silicone grip band creates a gentle, micro-suction effect against the skin, holding the temples flush without adding bulky layers under the hair.
The Targeted Security Tool Kit: The Layering Principle
The secret to bulletproof wig security is realizing there is no single “holy grail” product. Industry professionals use the Layering Principle, matching specific products to specific anatomical zones based on how those zones move.
Instead of gluing down the entire perimeter, try a 2-Point Strategy:
- Friction for the Nape: Use a velvet wig grip positioned perfectly under the occipital bone to catch the hair fibers and stop vertical sliding.
- Adhesion for the Temples: Because the temples require flush, lateral security, this is where you want to focus your tapes or adhesives.
If you are looking for extended hold during the week, learning exactly how to use wig tape strictly at the ear tabs can secure the front of the wig flawlessly while leaving the rest of your scalp free to breathe. For those with skin easily irritated by heavy glues, a targeted dab of hypoallergenic wig glue at the temples provides peace of mind without triggering redness.
Scenario-Based Security: Real-World Fixes
Different activities put different types of stress on your wig. Here is how to adjust your security map for specific challenges.
The Glasses Wearer’s Fix
The Problem: The arms of eyeglasses create friction and push the wig’s ear tabs outward, breaking the adhesive seal and causing the temples to slide back.The Fix: Tape is your best friend here. Unlike liquid adhesives which can peel when prodded by plastic frames, medical-grade wig tape creates a flatter, more rigid bond. Place a small strip of tape directly under the ear tabs. Carefully slide your glasses frames over the ear tabs rather than underneath them.
The Gym Protocol (Active Wear)
The Problem: Sweat breaks down adhesives, and the constant bouncing loosens passive security.The Fix: Rely heavily on friction rather than glue. A silicone wig grip is impervious to sweat and won’t stretch out when wet. Pair this with a slightly looser strap setting so your scalp can expand naturally as your body temperature rises.
The High Ponytail Anchor (Heavy Styles & Cosplay)
The Problem: Pulling hair into a high ponytail shifts the center of gravity backward, causing the nape to ride up dramatically and the front hairline to pull back.The Fix: You need mechanical anchoring. If you have biological hair, use bobby pins inserted in an “X” formation exclusively at the nape of the neck, pushing upward into the wig cap. Supplement this by securing the front hairline with a strong holding tape to counterbalance the backward pull.
Compassionate Care for Long-Term Wear
Security shouldn’t come at the cost of comfort. With nearly two decades of experience helping individuals navigate hair loss, we know that scalp health must always come first. The right fit shouldn’t leave deep red grooves on your forehead or cause headaches.
If you are currently experiencing medical hair loss, your scalp may be incredibly tender. Seeking out comfortable wigs for sensitive scalp conditions—featuring double-monofilament tops or fully hand-tied caps—can drastically reduce the need for aggressive adhesives. Furthermore, whether you wear human hair or prefer the incredible “shake-and-go” convenience of modern synthetic wigs, proper maintenance of your wig’s cap ensures the elastic materials retain their memory and shape, preventing the need to over-tighten them as they age.
The “Tug Test” Checklist
Before you head out the door, perform this quick 3-step physical verification to ensure your anatomical placement is correct:
- The Nape Check: Reach to the back of your head. Can you feel your occipital bone through the wig cap? The bottom edge of the wig should sit just below this curve, not bunched up on your neck.
- The Temple Press: Press flatly against your ear tabs. Do they lay flush against your skin? If there is a gap, you need to adjust your tape or check if your glasses are pushing them out.
- The Gentle Tug: Gently tug the hair at the crown forward and backward. The wig should move slightly with your scalp, rather than sliding over your scalp.
Frequently Asked Questions (FAQ)
Why does my wig always slide back on my head?
A wig sliding back usually indicates an issue at the front hairline or temples. It often means the wig is too small (pulling backward to find its natural resting place) or that your forehead curvature requires added friction, like a silicone or velvet wig grip, to stop lateral movement.
Can I use wig tape if I still have my bio hair?
Yes, but with caution. Never apply wig tape directly over your natural hair, as removing it can cause bald spots. If you have bio hair, you can use a wig cap to flatten your hair, and then apply tape just ahead of your natural hairline on clean, bare skin.
How tight should the adjustable straps actually be?
The straps should be adjusted just enough so that the nape of the wig gently cups the occipital bone. You should easily be able to slip two fingers under the perimeter of the wig. If it leaves red marks on your skin or gives you a headache, it is dangerously tight.
Why do the ear tabs on my wig stick out?
Ear tabs typically stick out if the wig cap is too large, or if the wig is sitting too far forward on your head. Ensure you are using the 4-Finger Rule to properly align the front of the wig with your natural hairline, and press the flexible wire inside the ear tabs inward so they curve toward your cheekbones.
What is the best way to secure a wig without any glue or tape?
The most effective glueless method is combining a properly fitted wig with a velvet or silicone wig grip band. The grip relies on directional friction—meaning it grabs the wig cap fabric and prevents it from sliding backward, offering incredible security without messy adhesives.
Ready to Secure Your Look?
Understanding the mechanics behind wig slippage is the first step toward a confident, worry-free wearing experience. Take a moment to assess how your current wig fits your occipital bone and temples. By shifting away from simply tightening straps to embracing targeted, anatomical solutions, you can achieve a flawless, secure fit that feels as natural as it looks.